How to create activities with different schedules
If a demo or workshop repeats during the event, create it once with all its schedules: each session shows in the program with its own places.
14 steps with screenshots of the app
When an activity repeats, say a demo at seven and another at nine, there's no need to create it twice: you add more schedules while creating it. This guide creates a demo with two sessions.
- Have the Meeplay app installed and be logged in to your account.
- Manage an organization on Meeplay. If you don't have one yet, follow the How to create your organization guide first.
- Have the Meeplay created: see How to create Meeplays from your organizer account.
In each screenshot, what you need to tap is outlined in yellow and pointed out with an arrow.
- Step 1 of 14
Switch to your organization's profile
On the home screen, tap the two arrows button to the right of your name.
- Step 2 of 14
Choose your organization
Under Select an organizer, tap your organization's name.
- Step 3 of 14
Open the agenda
Tap the calendar on the bottom bar.
- Step 4 of 14
Open the Meeplay
In list view, tap the Meeplay you want to add the activity to.
- Step 5 of 14
Tap "Add activity"
On the page, tap the Add activity icon.
- Step 6 of 14
Fill in the activity and add a schedule
Fill in the title, description, date and type as in How to create the activity schedule: that will be the first session. Scroll down to Additional schedules and tap Add.
- Step 7 of 14
Choose when it starts
A row appears for the new session. Tap Start date*.
- Step 8 of 14
Session day and time
Choose the day and turn the wheel to the start time. In this example, the same Thursday at 21:00. Tap Accept.
- Step 9 of 14
And when it ends
Tap End date on the same row and do the same with the end time: here, 22:00. Tap Accept. Each session needs a start and an end.
- Step 10 of 14
Add as many as you need and publish
The session is now on the list. Add adds more; the bin on the row removes it. When they're all there, tap Publish.
- Step 11 of 14
Confirm
Tap Publish.
- Step 12 of 14
First session published
The first session's page opens. Go back to see the program.
- Step 13 of 14
Open the program
Under Activity program, tap See all.
- Step 14 of 14
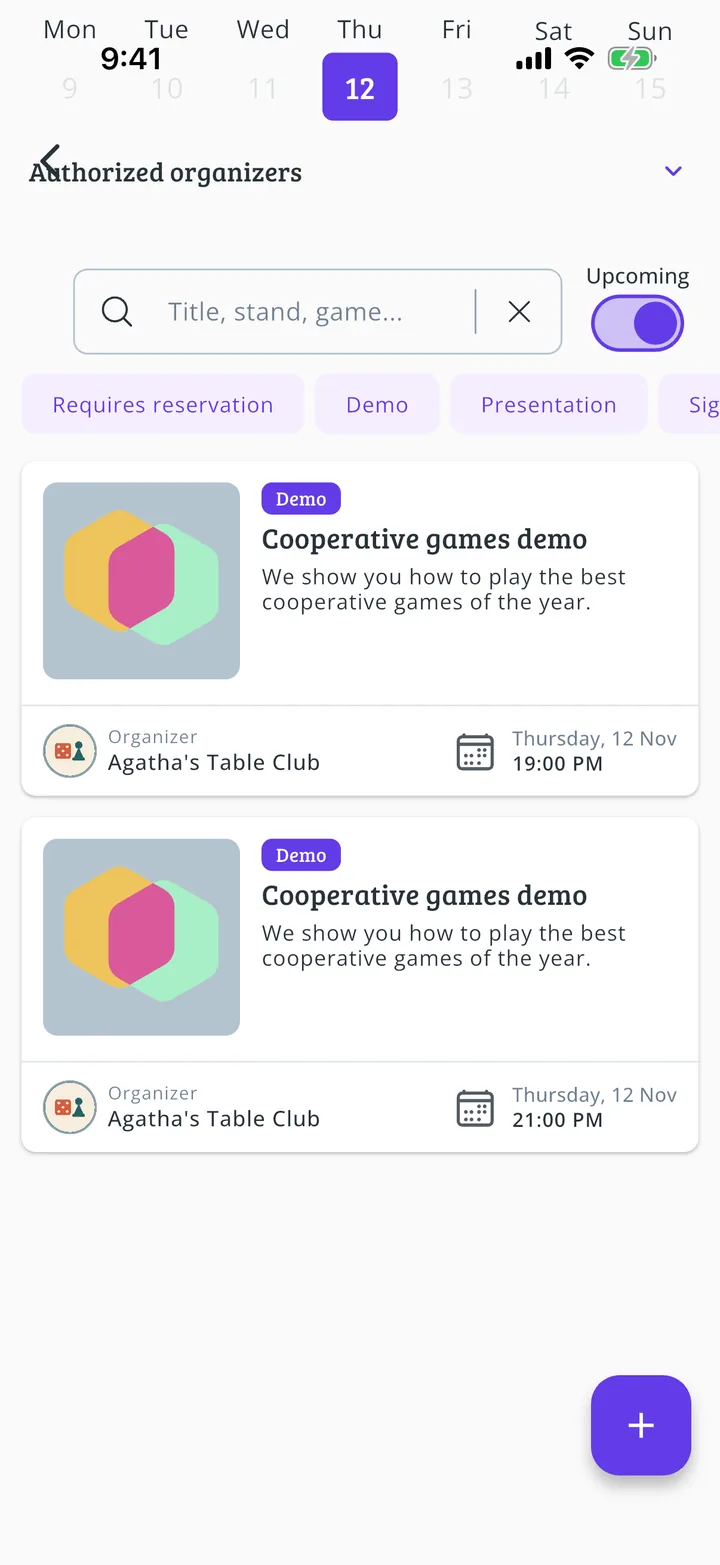
One activity per session
Each schedule shows in the program as an activity of its own, with its time and places. That way people sign up for the session that suits them, and you can change or remove one without touching the others.
All done!
You have finished the guide. If something did not go as in the screenshots, tell us which step you got stuck on and we will help you.